To screenshot an MSI laptop, press the “Windows logo key” and the “Print Screen key” together. By pressing these keys simultaneously, you can capture and save a screenshot of your MSI laptop’s current display.
This method works on all MSI laptop models and is a quick and convenient way to capture images on your device. Screenshots are useful for various purposes, such as saving important information, capturing error messages, or sharing visual content with others.
Whether you need to document a software issue, create a tutorial, or simply capture a memorable moment on your MSI laptop, taking a screenshot is a straightforward process. This article will guide you through the steps to screenshot your MSI laptop and help you make the most of this useful feature.
Credit: recorder.easeus.com
Why Take Screenshots On An Msi Laptop
Capture your MSI laptop screen effortlessly with these simple steps to take screenshots. This user-friendly guide will help you screenshot your MSI laptop easily and quickly without any hassle.
Taking screenshots on your MSI laptop can be a valuable tool for a variety of reasons. Whether you want to capture important information, troubleshoot technical issues, or seek tech support, screenshots serve as visual proof that can be easily shared and referenced. This blog post will explore the various advantages of taking screenshots on an MSI laptop, highlighting how this simple function can enhance your overall laptop experience.
Capture Important Information
When it comes to capturing important information on your MSI laptop, screenshots are an invaluable tool. Whether you need to save a confirmation number for an online purchase or keep a record of an important email, screenshots allow you to quickly capture and store this information in a visual format.
Screenshots can also be extremely helpful when conducting research or studying. By capturing sections of an e-book, website, or presentation, you can easily refer back to the relevant information without the need for tedious note-taking. With just a few clicks, you can highlight and bookmark key points, ensuring that you have quick and easy access to the information you need.
Additionally, screenshots can be used to capture error messages or software bugs that you encounter while using your MSI laptop. This is particularly useful when communicating with tech support or seeking assistance on online forums. By providing a visual representation of the issue, you give others a clear understanding of what you are experiencing, enabling them to offer more accurate solutions.
Troubleshooting And Tech Support
When facing technical issues on your MSI laptop, taking screenshots can be a valuable step in troubleshooting. Whether you are encountering a software glitch or experiencing hardware problems, capturing screenshots of error messages, system settings, or performance issues helps you diagnose and communicate the problem effectively.
Using these screenshots, you can seek tech support more efficiently by sharing the visuals with the service provider or online community. Instead of spending time describing the issue in words, a screenshot allows others to see exactly what you are experiencing. This speeds up the support process, as technicians can quickly analyze and provide accurate solutions based on the visual evidence provided.
Furthermore, screenshots can be used to document and compare settings and configurations before and after making changes to your MSI laptop. This is useful when trying to revert back to a previous state or troubleshoot issues that arise after system updates or software installations. Screenshots serve as a visual reference, ensuring that you can easily revert any changes made, if necessary.
By harnessing the power of screenshots, you empower yourself with visual evidence when capturing important information, troubleshooting, and seeking tech support. When utilized effectively, screenshots have the potential to save you time, improve communication, and enhance your overall MSI laptop experience.

Credit: www.youtube.com
Methods To Screenshot An Msi Laptop
Want to capture screenshots on your MSI laptop? Whether you need to showcase an error message, save important information, or simply capture a memorable moment, there are various methods to take screenshots quickly and easily. In this article, we’ll explore three different ways to screenshot an MSI laptop: using a built-in keyboard shortcut, the Snipping Tool, and third-party screenshot tools.
Using Built-in Keyboard Shortcut
One of the simplest and quickest ways to capture a screenshot on your MSI laptop is by using a built-in keyboard shortcut. This shortcut allows you to capture the entire screen or a specific window depending on your needs. Follow these steps to take a screenshot using the keyboard shortcut:
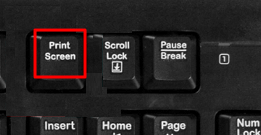
- Locate the PrtSc key on your MSI laptop’s keyboard. It is usually located near the Delete key.
- Press the PrtSc key to capture the entire screen.
- To capture only the active window, press Alt + PrtSc instead.
- Open an image editing software, such as Paint, and press Ctrl + V to paste the screenshot.
- Save the screenshot to your desired location.
Using Snipping Tool
If you prefer more flexibility in capturing screenshots, you can utilize the Snipping Tool, a built-in screenshot tool available in Windows operating systems. The Snipping Tool allows you to capture specific areas of your screen with ease. Here’s how you can use the Snipping Tool to take screenshots on your MSI laptop:
- Click on the Start menu and search for “Snipping Tool”.
- Open the Snipping Tool application.
- Click on New to start a new snip.
- Select the desired snip type – Free-form, Rectangular, Window, or Full-screen.
- Click and drag your cursor to capture the desired area.
- Release the mouse button to save the snipped screenshot.
- Choose the location to save the captured screenshot.
Using Third-party Screenshot Tools
If the built-in options don’t meet your requirements, you can consider using third-party screenshot tools. These tools often offer additional features and customization options for capturing screenshots. Some popular third-party screenshot tools include Lightshot, Snagit, and Greenshot. Explore the various tools available and choose one that best suits your needs.
Step-by-step Guide: Screenshot An Msi Laptop
Welcome to our step-by-step guide on how to take a screenshot on an MSI laptop. Whether you want to capture an important moment from a video, document an error message, or save an image for later use, this guide will provide you with the necessary steps to take a screenshot effortlessly. By following our instructions, you’ll be able to save and use screenshots on your MSI laptop in no time. Let’s dive into the details!
Determine The Desired Content
Before taking a screenshot on your MSI laptop, you need to determine what content you want to capture. It could be a specific webpage, a specific area of your laptop screen, or even an entire window. Knowing the desired content will help you choose the most suitable screenshot method for your needs. Take a moment to decide what you want to capture before moving forward.
Choose The Suitable Screenshot Method
Depending on the type of content you want to capture, MSI laptops offer different methods for taking screenshots. Here are three common screenshot methods and how to use them:
| Method | Screenshot Key Combination | Description |
|---|---|---|
| Full Screen | Press Win + PrtScn | Pressing the Win (Windows) key and the PrtScn (Print Screen) key simultaneously will capture the entire screen and save it to your Screenshots folder. |
| Active Window | Press Alt + PrtScn | If you only want to capture the active window, such as a specific application or program, press the Alt (Alternate) key and the PrtScn (Print Screen) key simultaneously. The screenshot will be saved to your Screenshots folder. |
| Custom Area | Press Win + Shift + S | If you prefer to capture a specific area of your screen, use the Win (Windows) key, the Shift key, and the S key simultaneously. This will open the Snip & Sketch tool, allowing you to select the desired area and save the screenshot to your preferred location. |
Take The Screenshot
Once you have chosen the appropriate screenshot method, follow these steps to capture your desired content:
- For a full-screen screenshot, press the Win + PrtScn keys at the same time. The screen will dim briefly, indicating that the screenshot has been taken.
- For an active window screenshot, select the desired window by clicking on it, then press the Alt + PrtScn keys simultaneously. The screen will dim momentarily to indicate a successful screenshot.
- If you prefer a custom area screenshot, press the Win + Shift + S keys simultaneously. Your screen will freeze, and a toolbar will appear at the top of the screen. Click and drag to select the desired area, and release the mouse button to capture the screenshot.
Save And Use The Screenshot
After taking a screenshot, it’s essential to save it for future use. By default, all screenshots taken on an MSI laptop are automatically saved in the Screenshots folder, which can be accessed through the File Explorer. To locate your screenshots, follow these steps:
- Open the File Explorer by pressing Win + E on your keyboard.
- Navigate to the “Pictures” folder in the left sidebar.
- Inside the “Pictures” folder, you’ll find the “Screenshots” folder. Open it, and you’ll find all your captured screenshots.
Now that you know how to take screenshots on your MSI laptop and where to find them, you can easily capture and utilize visual content whenever needed. Whether it’s for work, education, or personal use, screenshots can be a valuable tool. Start capturing your favorite moments or important information today with these simple steps!
Credit: recorder.easeus.com
Troubleshooting: Screenshot Not Working On Msi Laptop
Struggling with capturing screenshots on your MSI laptop? Get the solution to the problem and learn how to screenshot with ease on your MSI laptop.
Troubleshooting: Screenshot Not Working on MSI Laptop Are you facing issues trying to take a screenshot on your MSI laptop? Don’t worry, you’re not alone. Sometimes, the screenshot function may not work as expected, leaving you frustrated and wondering what went wrong. In this section, we will explore some troubleshooting steps to help you resolve the issue. Let’s dive in!Check Keyboard Settings
If you’re unable to take a screenshot on your MSI laptop, the first thing you should do is check your keyboard settings. Sometimes, certain key combinations are disabled or reassigned, preventing you from capturing a screenshot. Follow these steps to ensure your keyboard settings are correct:- Go to the Start Menu and open the Control Panel.
- Select “Hardware and Sound” and then click on “Keyboard.”
- In the Keyboard Properties window, navigate to the “Key Settings” tab.
- Make sure the “Enable key settings” box is checked.
- Scroll down and locate the “PrtScn” key. Ensure that it is assigned to the “Print Screen” function.
- Click “Apply” and then “OK” to save the changes.
Ensure Software Compatibility
Another potential reason why the screenshot function may not be working on your MSI laptop is software compatibility. Certain applications or programs may interfere with the screenshot feature, causing it to malfunction. Here’s what you can do to ensure software compatibility:- Update all your applications and programs to the latest versions to eliminate any bugs or conflicts.
- Disable any running programs that may be conflicting with the screenshot function.
- Try capturing a screenshot in a different software or application to check if the issue persists.
Update Graphics Drivers
Outdated or faulty graphics drivers can also prevent you from taking screenshots on your MSI laptop. By updating your graphics drivers, you can often resolve this issue. Follow these steps to update your graphics drivers:- Right-click on the Start Menu and select “Device Manager.”
- Expand the “Display adapters” category.
- Right-click on your graphics card and select “Update driver.”
- Choose the option to “Search automatically for updated driver software.”
- Windows will search for the latest driver and install it.
- Restart your laptop to apply the changes.
Alternative Methods To Capture Screenshots On Msi Laptop
Capture screenshots on your MSI laptop with alternative methods that are simple and effective. Learn how to easily screenshot your MSI laptop without any hassle or complicated steps.
Capturing screenshots on an MSI laptop can be essential for various purposes, whether it’s for sharing information, saving important visuals, or troubleshooting purposes. While the traditional method of using the print screen button always works, there are alternative methods that can provide a more efficient and streamlined experience. In this article, we will explore two alternative methods to capture screenshots on an MSI laptop: using MSI Dragon Center and utilizing the Windows Game Bar. These methods offer additional functionalities and convenience, making it easier for users to capture and save screenshots effortlessly.Using Msi Dragon Center
MSI Dragon Center is a powerful software designed specifically for MSI laptops that allows users to customize their laptops’ performance settings, monitor system resources, and also capture screenshots. If you already have MSI Dragon Center installed on your laptop, follow these steps to capture a screenshot:- Launch the MSI Dragon Center software by searching for it in the Start menu or taskbar.
- Once the software is open, navigate to the “Capture” tab, usually located in the top navigation menu.
- Next, you can choose from various preset screenshot modes like full screen, window, rectangular, or freeform. Select the mode that suits your requirement.
- After selecting the desired screenshot mode, simply click on the capture button to take the screenshot.
- The captured screenshot will be saved in a pre-defined location, typically in the Pictures folder on your MSI laptop.
Using Windows Game Bar
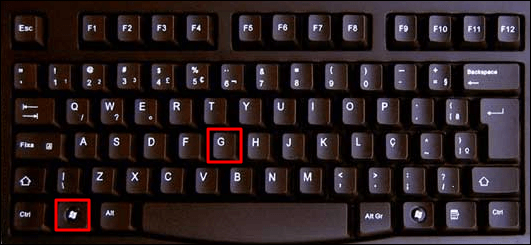
Windows Game Bar is a built-in feature in Windows 10 that is primarily designed for gamers to capture gameplay footage. However, it can also be utilized to capture screenshots on an MSI laptop. Here’s how you can use Windows Game Bar to capture screenshots:- Press the Windows key and the letter “G” simultaneously to open the Windows Game Bar.
- If prompted, confirm that you want to open the Game Bar by clicking on “Yes, this is a game.”
- Once the Game Bar is open, locate the “Capture” button, usually represented by a camera icon.
- Click on the “Capture” button to capture a screenshot.
- The screenshot will be automatically saved in the “Captures” folder, located in the “Videos” directory of your MSI laptop.
Frequently Asked Questions For How Do I Screenshot An Msi Laptop?
How Can I Take A Screenshot On My Msi Laptop?
To take a screenshot on an MSI laptop, press the “Windows key + PrtScn” simultaneously. The screen will dim momentarily, indicating that the screenshot has been captured. You can find your screenshots in the “Pictures” folder, within a subfolder called “Screenshots.
“
Is There Another Way To Screenshot On An Msi Laptop?
Yes, you can also use the “Snipping Tool” application that comes pre-installed on Windows. Simply type “Snipping Tool” in the search bar, open the application, click “New,” select the area you want to capture, and save the screenshot.
Are There Any Third-party Apps To Screenshot An Msi Laptop?
Yes, there are several third-party apps available for screenshotting on an MSI laptop. Some popular options include Lightshot, Greenshot, and Snagit. These apps offer additional features such as annotating, editing, and sharing the screenshots. You can download them from their respective websites or app stores.
Conclusion
Capturing a screenshot on an MSI laptop is a simple and quick process that can be accomplished using various methods. Whether you prefer using the traditional keyboard shortcuts or utilizing the built-in software, there are plenty of options available to suit your needs.
By following the step-by-step instructions outlined you can easily take screenshots on your MSI laptop and share them with others. So, go ahead and start capturing those memorable moments or important information on your MSI laptop with ease!

I have been working as an SEO Expert in Bangladesh for a long time and now providing the best SEO Service in Bangladesh. With the approach to Semantic SEO that eschews superfluity. I can get your business web page at the top of the SERP list. Using the latest digital marketing trends, I can enhance your online visibility and drive more website traffic.
